

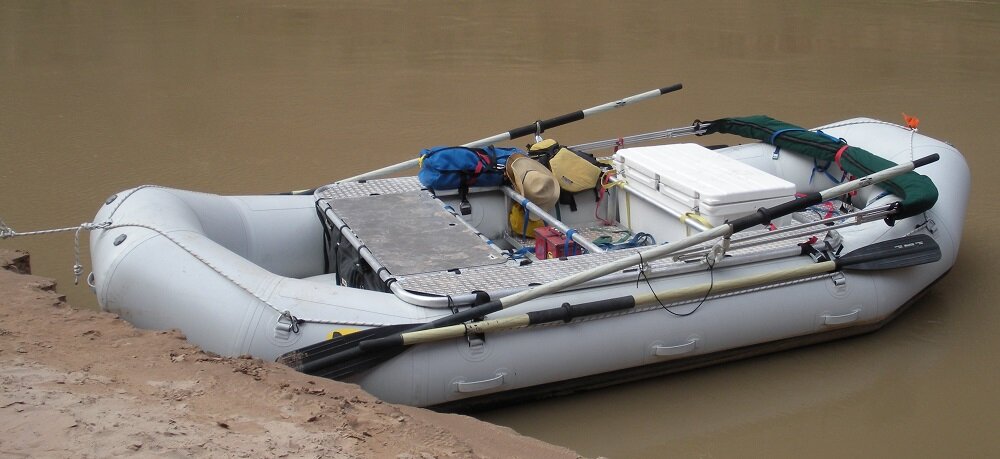
Oar Tower Placement & The 4-bay Raft Frame Design Challenge
/4-bay raft frames allow for a cooler, dry box, footwell and a drop bag or another dry box. The challenge with designing these frames comes when you try to center the oar towers at the raft’s natural pivot point. That said, since these are the most common raft frames we build, we’ve had lots of opportunities to try out different configurations which, in turn, has helped us come up with this list of things you might want to think about when designing your own 4-bay.
Please keep in mind, this information is only meant to help guide you with the decisions you’ll need to make for your raft. Personal comfort with your set up is the ultimate end goal. We’re all different, with different needs.
Pivot point – Let’s start here.
In a perfect world, to most efficiently spin, the raft’s pivot point would be the place you’d put your oar towers. In the real world, oar towers aren’t usually at the raft’s pivot point. How far off affects how it pivots.
Oar towers- How far off center is too much?
12-18” is okay. More than that and the leverage you exert may lose some of its effectiveness.
Weight distribution – Can be used to your advantage.
How the raft is loaded affects how it pivots. If your oar towers are off the pivot point by more than 18”, keep that in mind when you’re packing your raft. Try to center your heaviest items, keeping weight off the bow and stern.
Rowers seat & Oar tower spacing
Everyone’s rowing geometry is different but, we have found that most people have their oar towers set 9-11” forward of the bar of the bay they are sitting on. This buys you a little wiggle room when trying to center your oar towers.
Oar swing - Protecting your passengers.
For some, trying to keep passengers out of the way of a loose, swinging, oar may supersede trying to keep the oar towers dead center on the raft.
Rowing styles
How you tend to make difficult moves may help guide your layout decision. If you’re more of a pusher than a puller, you may want to pay closer attention to having your oar towers dead center. If you’re more of a puller, or tend to face your danger and pull away, having your oar towers slightly off the center may be less of a concern. The assumption here is the pushing stroke tends to be the weaker of the two strokes.
2nd Bay Footwell
This set up from the front to the back may look like this:
1st bay: Drop Bag/Hatch or Dry Box
2nd bay: Rowers Footwell
3rd bay (Rower’s Seat): Dry Box or Cooler
4th bay: Drop Bag or Dry Box
Advantages/Disadvantages:
This set up seems to perform better if you tend to push through rapids.
Passengers may be closer to a loose oar and/or oar swing.
If using a bimini, this set up makes it easier to effectively shade the passengers and rower on larger rafts.
Tips for optimizing:
Make the first bay as big as you can. That helps to move the footwell further back, which in turn moves passengers out of the oar swing.
Try to size the footwell so that the bar bordering the bay you are sitting on is just behind the frame’s center line.
3rd Bay Footwell
This set up from the front to the back may look like this:
1st bay: Drop Bag/Hatch or Dry Box
2nd bay: Dry Box or Cooler
3rd bay: Rowers Footwell
4th bay (Rower’s Seat): Dry Box or Cooler
Advantages/Disadvantages:
Having 2 bays in front of the rowers footwell creates a large area for lounging &/or sleeping on the raft.
Passengers are well out of the oar swing.
More attention needs to be paid to weight distribution.
If using a bimini, it may be more difficult to effectively shade both the passengers and the rower.
Tip for optimizing:
Make the 4th bay have the biggest boxy item, like a large cooler or sizable dry box. The more you can make this bay hold the biggest, good to sit on, item, the more it pushes the oar towers closer to the center of the raft.
When you’re ready to design your own 4-bay frame, we hope that this has given you some things to think about.
Until then, see you on the river!
-
September 2022
- Sep 16, 2022 The All Flat Raft Frame - part 2 of 2 Sep 16, 2022
-
July 2022
- Jul 14, 2022 The All Flat Raft Frame - part 1 of 2 Jul 14, 2022
-
May 2022
- May 12, 2022 Cooler Latch Surgery May 12, 2022
-
April 2021
- Apr 4, 2021 Comparing 12’ Rafts - Hyside Max 12 v NRS 12’ Osprey Apr 4, 2021
-
January 2021
- Jan 19, 2021 Designing for Cooler Latch Clearances Jan 19, 2021
-
November 2020
- Nov 4, 2020 Trying out a few new ideas on our 2020 NRS E-160 demo raft. Nov 4, 2020
-
April 2020
- Apr 21, 2020 Oar Tower Placement & The 4-bay Raft Frame Design Challenge Apr 21, 2020
-
October 2019
- Oct 31, 2019 Adding Side Decks with SeaDek to a Single Rail Frame Oct 31, 2019
-
August 2019
- Aug 23, 2019 Oar Tower Testing: Speed-Rail fitting with stanchion vs NRS frame oar mount Aug 23, 2019
- Aug 12, 2019 Can you put SeaDek foam on Diamond Plate Decks? Aug 12, 2019
-
May 2019
- May 17, 2019 Choosing & Setting Up a Raft Bimini May 17, 2019
-
March 2019
- Mar 28, 2019 Finishing details of the first CHUB Mar 28, 2019
- Mar 15, 2019 Comparing 16' Rafts - NRS E-160 v Hyside PRO 16 XT Mar 15, 2019
-
November 2018
- Nov 6, 2018 Our Aluminum "Chub" Hatchery. Nov 6, 2018
-
August 2018
- Aug 11, 2018 New Raft - New Ideas Aug 11, 2018
- Aug 2, 2018 Testing out using foam for the side decking on a raft frame Aug 2, 2018
-
June 2018
- Jun 30, 2018 Rigging Rails for Raft Frames Jun 30, 2018
-
May 2018
- May 29, 2018 Hog Island - One River Many Voices Project May 29, 2018
-
March 2018
- Mar 22, 2018 Dry Box Tray Mar 22, 2018
- Mar 8, 2018 A visit from the Wooden Brother Mar 8, 2018
-
February 2018
- Feb 16, 2018 The Details in the Dories Feb 16, 2018
- Feb 7, 2018 Dory Build - the "Dimock" Evolved Briggs Boats Feb 7, 2018